Documentation Index
Fetch the complete documentation index at: https://docs.dialai.ca/llms.txt
Use this file to discover all available pages before exploring further.
User Management
The Users page lets you create, filter, and manage admin users for your tenant. Access it via Settings > Users in the left navigation menu.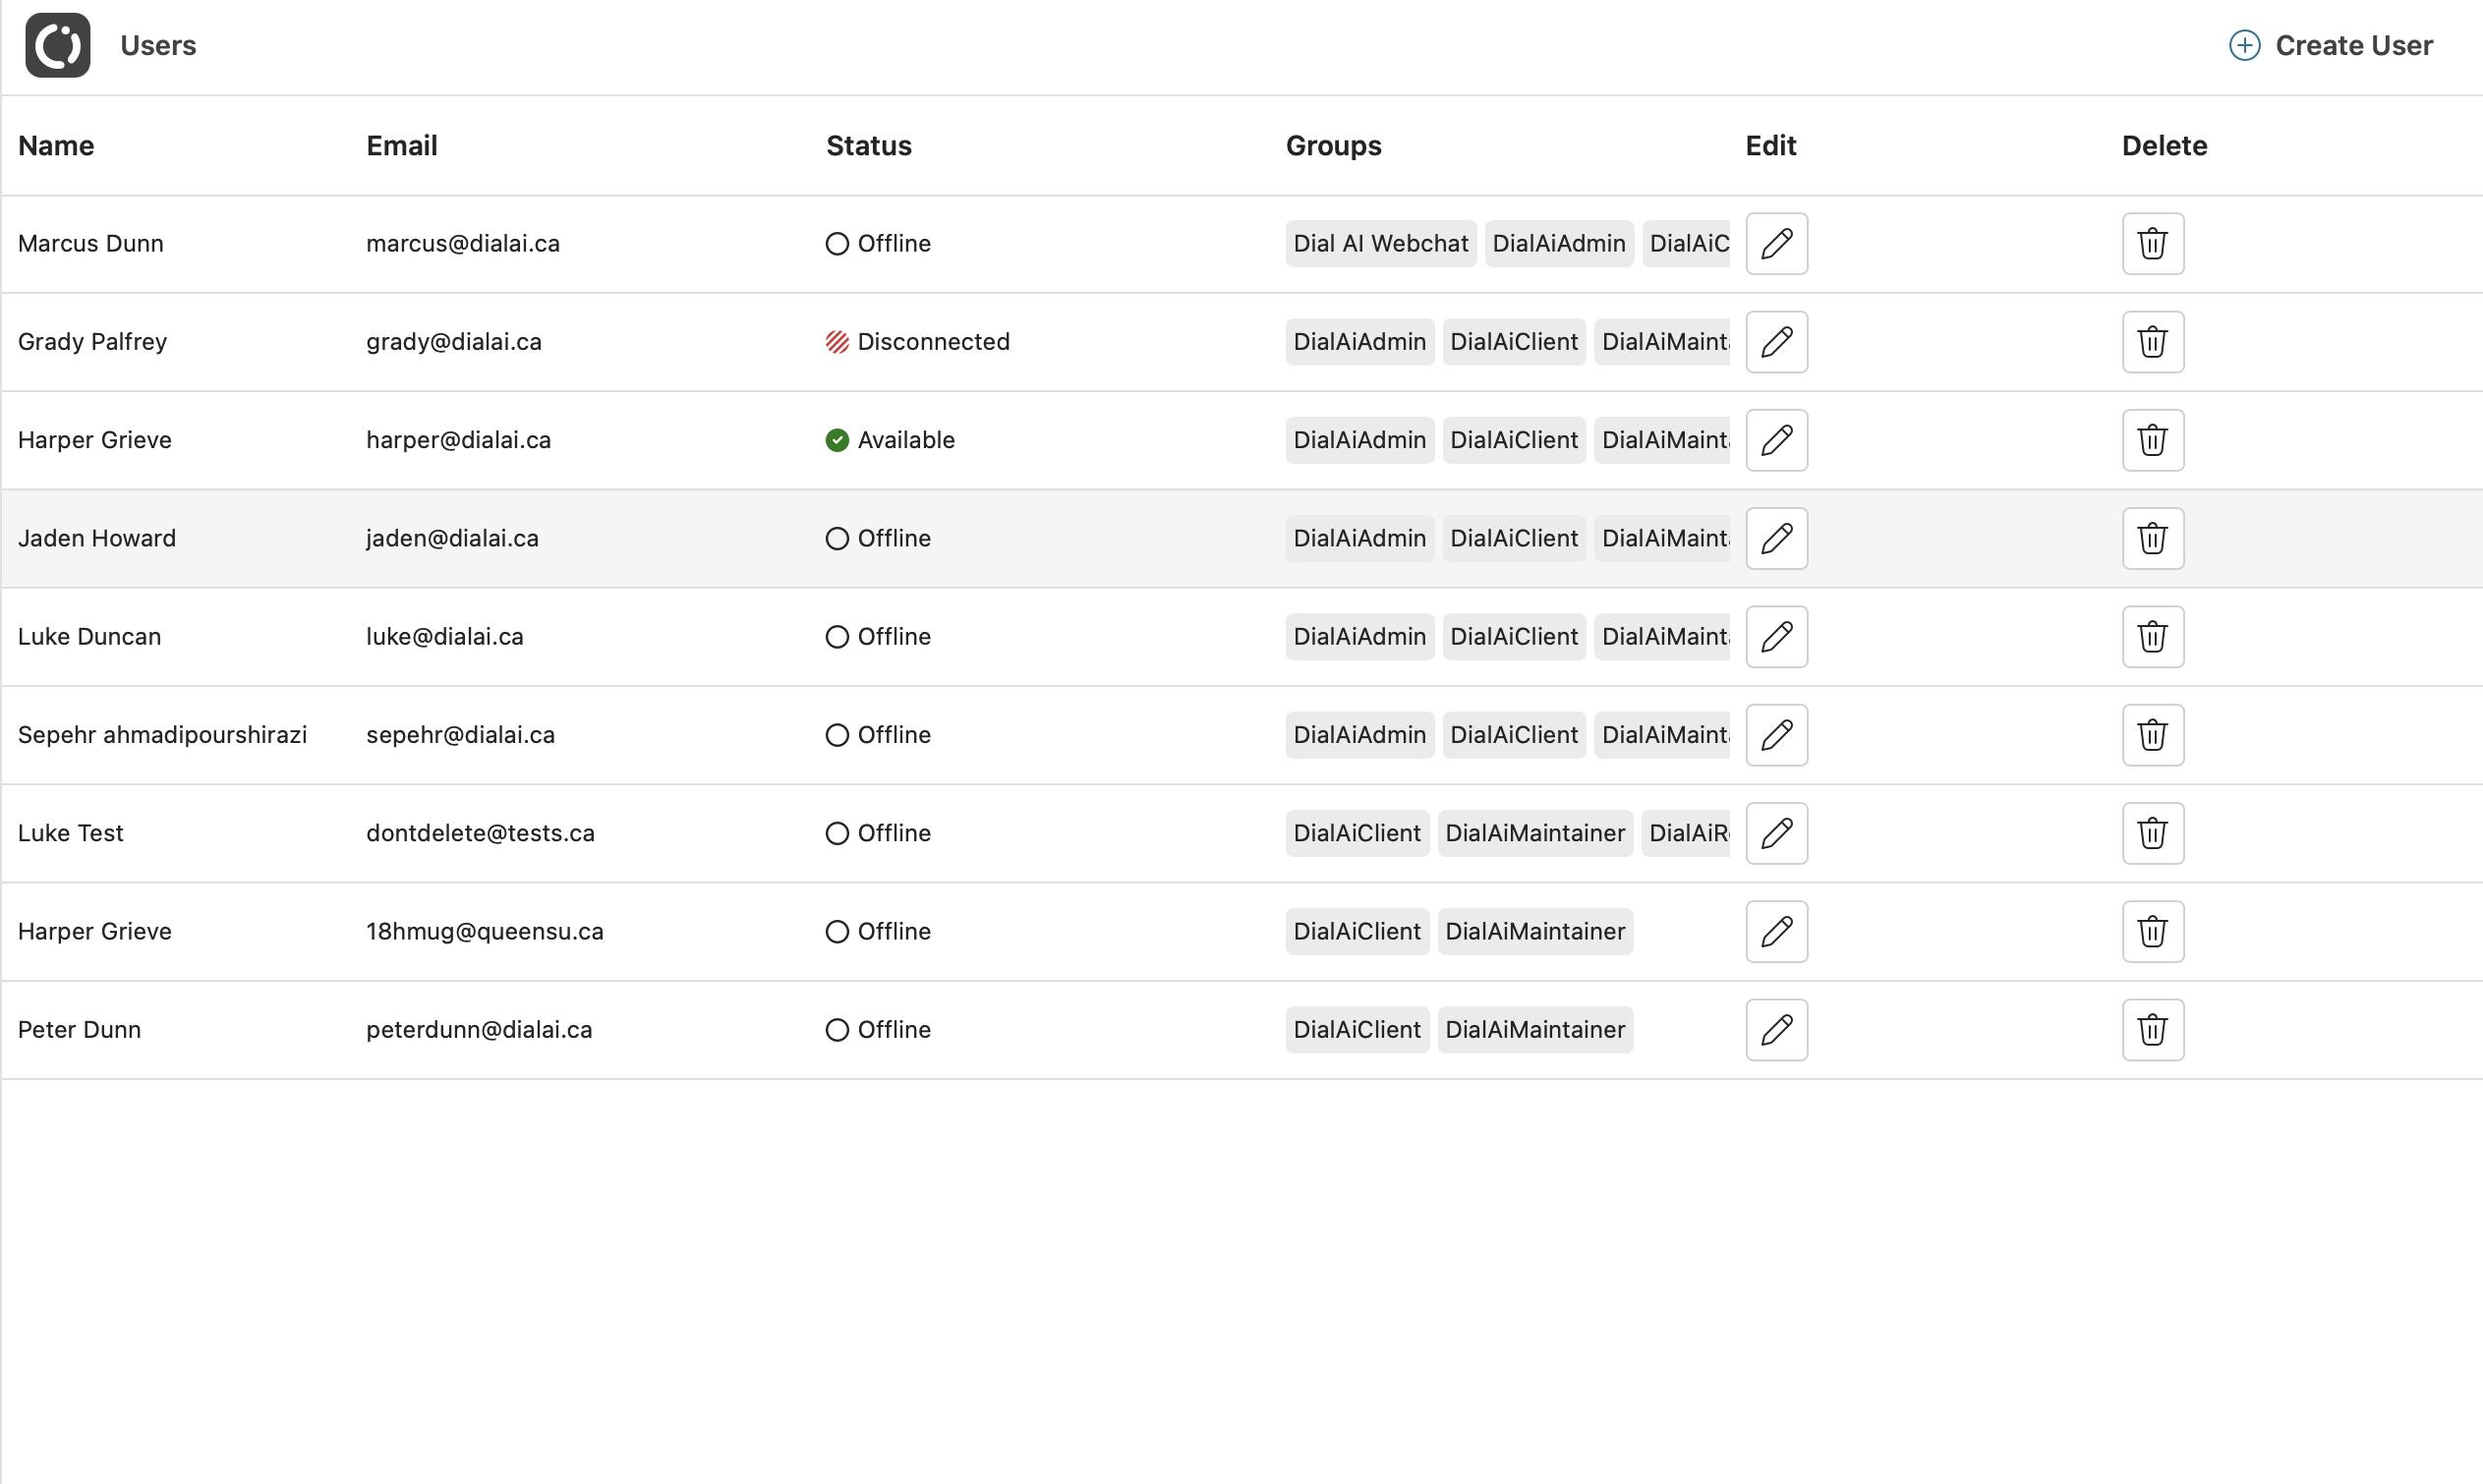
Columns explained
| Column | Details |
|---|---|
| Name / Email | The user’s display name and email address. Both are searchable. |
| Status | Available, Busy, Offline, or Disconnected (unexpected browser disconnect). |
| Groups | Role‑based badges (e.g. DialAiAdmin, DialAiClient, DialAiMaintainer). |
| Edit | Opens the user drawer for updates. |
| Delete | Soft‑deletes the account after confirmation. |
Filtering users
Click the Filter button at the top of the user list to narrow results by name, email, status, or group membership.Creating a user
- Click Create User.
- Fill in the required fields:
- Name
- Email (must be unique)
- Groups (at least one)
- Press Save. The invite email is sent automatically with a password‑set link.
Bulk adding users
Click Bulk Add Users to add multiple users at once. This is useful when onboarding a new team or provisioning accounts in bulk.Editing a user
- Click the edit icon on the row.
- Update any of the editable fields:
- Groups — assign or remove role‑based groups
- Status — set the user’s availability
- CSR User — toggle the CSR flag
- Skills — assign skills used for routing
- Voice Calls — enable or disable voice‑call routing
- Max Chats / Max Emails — set concurrent conversation limits (0–10)
- Mobile Phone Number — set the PSTN transfer destination
- Click Update.
Promote temporary admins by simply adding the DialAiAdmin group—no re‑invite required.
Deleting (de‑provisioning)
Soft deletion retains historical reporting but blocks future logins.- Click the delete icon.
- Type the user’s email to confirm.
- Click Delete.